Offgrid Raspberry Pi Setup
October 18, 2021 (updated October 26, 2021)
Important Notes:
This approach has only been tested on a Raspberry Pi 3B+.
If you plan to use this document with the Mobilinkd TNC it is recommended that you purchase an external USB WiFi dongle. I ran into this bug which rendered my WiFi access point on the Pi useless when the Bluetooth was active. Here’s the one I use.
The Approach
First, it should be noted that the installation and configuration approach described in this Raspberry Pi series is 100% tailored around my mission objectives. There are many ways to install and configure a Raspberry Pi, but this is the approach that I use on all my Pi's for the purpose of deploying an offgrid amateur radio field station.
In my case, Internet access is only required for the initial installation, during rare software updates, and the occasional update of data sets (e.g. list of current Winlink RMS gateway stations, FCC database, etc). I believe that once configured, the system should remain fairly static. I have learned from experience that software updates introduce more risk than reward. Remember, I am an offline and offgrid operator. This system is my backup in the event that my Internet, cell access and/or primary power are not available. Lastly, this approach has the added benefit of being a bit more secure as there is no Internet-based attack vector once configured.
OK, you have been warned. If you're on board with my vision for deploying a Pi field station, let's continue.
Install Raspberry Pi OS
If you’re new to the Raspberry Pi, let’s get started by installing the Raspberry Pi OS on an SD card. I have modest storage needs for the Pi’s I use for amateur radio and typically use SD cards between 32 GB and 64 GB, but how much storage you need is up to you.
First, you’ll need the following to prepare your SD card. Note: an SD card and reader are already included if you opted for the starter kit on the parts page.
Another computer to prepare the SD card
The easiest way to load the Raspberry Pi OS image onto your SD card is using the Raspberry Pi Imager. Download and install it on your computer.
Once installed, perform the following.
Insert the micro SD card into the USB SD card reader.
Insert the USB SD card reader into your computer.
Launch the Raspberry Pi Imager program.
Select Raspberry Pi OS (32-bit).
Select the micro SD card as the storage.
Click the write button.
Grab a beverage and wait.

Raspberry Pi Imager
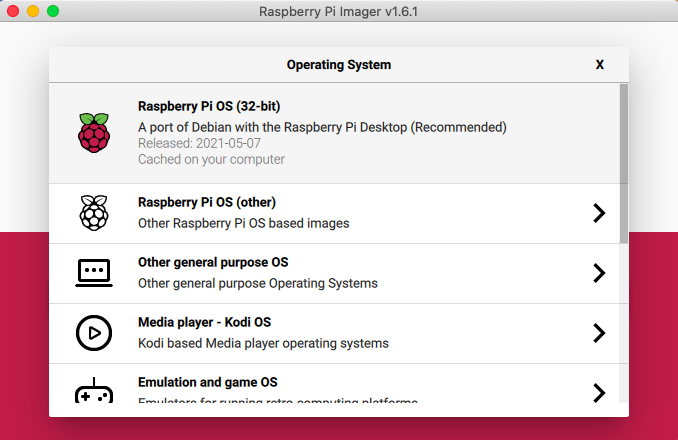
Select Raspberry Pi OS (32-bit)
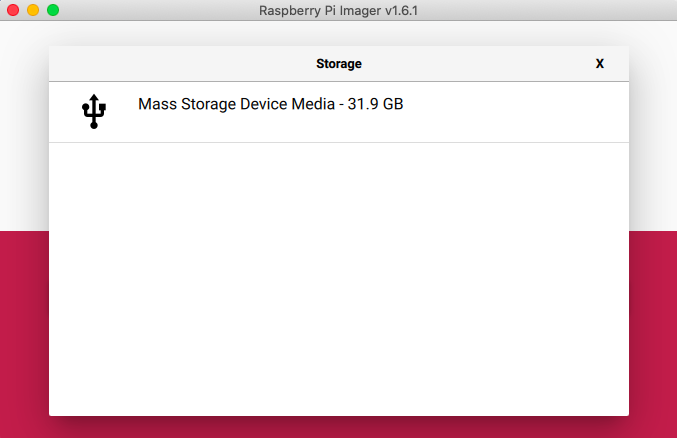
Select storage
First Boot
I find that the easiest way to setup your Pi on the first boot up is to connect it to a monitor, keyboard, mouse and wired ethernet. There are advanced options for connecting directly to your Pi over a network on the initial boot up, but that is beyond the scope of this document.
Once you have everything connected, turn on your Pi. You should be greeted with a welcome dialog. Perform the following:
- Set country and language.
- Set a password.
- Skip the WiFi network screen. We will be performing an advanced network configuration later.
- Skip the software update. We will do this manually.
- When asked to reboot, select Later.
Next, open a terminal window. We will configure some initial network settings so that we can connect to this system remotely. This will be the last time that the Pi will be connected to a monitor, keyboard and mouse.
Configure the Pi.
$ sudo raspi-configSet the hostname: System Options > Hostname. I like to name the Pi after my radio (i.e. ft60r).
Set the screen resolution: Display Options > Resolution. I set the screen resolution to a size that is appropriate for a remote desktop connection. I find that 1280x700 works well when I connect to the desktop remotely from my iPad Mini.
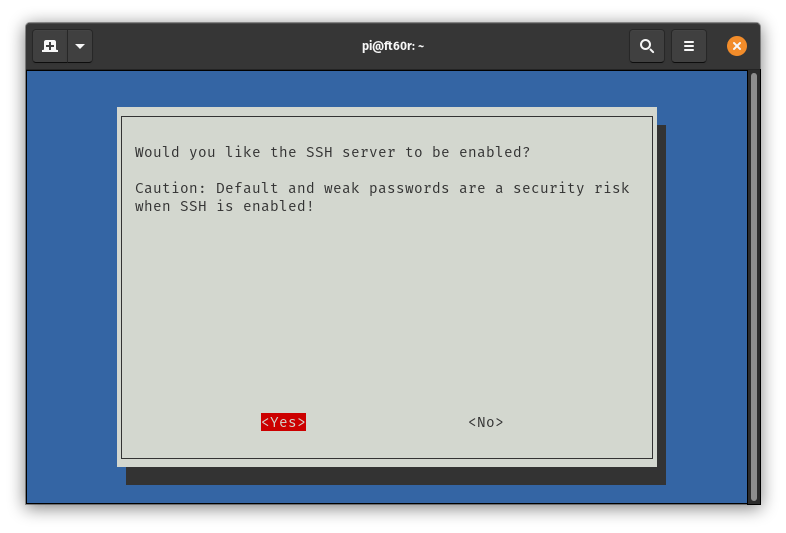
Since we plan to connect to the Pi remotely, we will enable two network services on the Pi. Navigate to Interface Options and enable SSH and VNC.
Now, select Finish. Select No when asked to reboot.
Make a note of the IP address of your Pi's wired ethernet by executing:
$ ifconfig eth0 | grep inet- Shutdown the Pi.
$ sudo shutdown -h now- Disconnect the monitor, keyboard and mouse.
At this point, you should have two cables connected: the power and ethernet cables. Turn on your Pi.
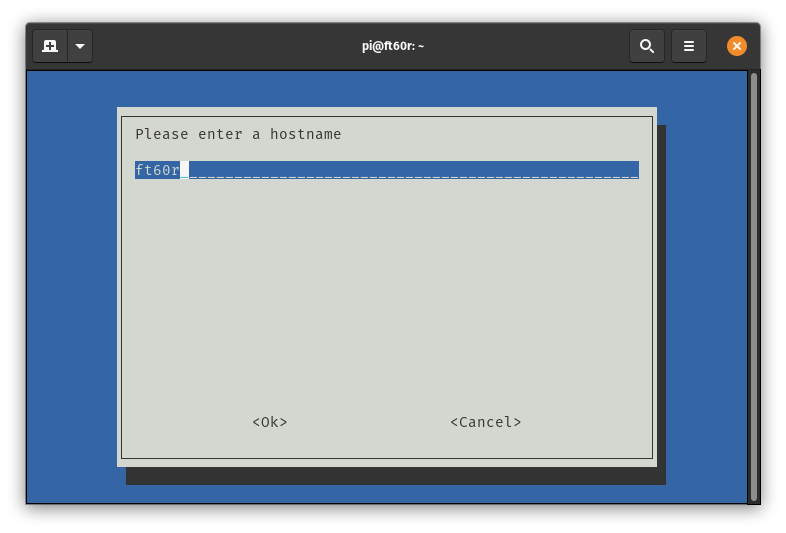
Set hostname
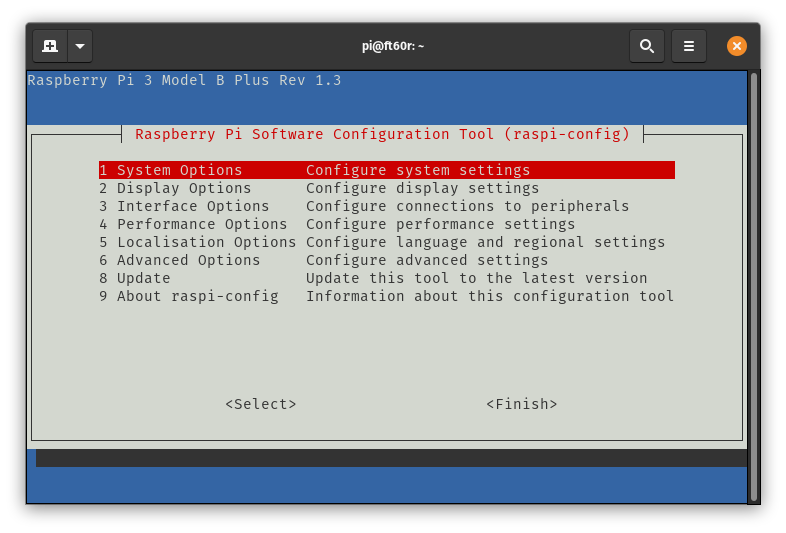
raspi-config

Set screen resolution
Enable remote access
Configuring the Pi as an Access Point
Important Notes:
If you are using an external USB WiFi adapter, replace all mentions of wlan0 with wlan1. Again, using an external WiFi adapter is recommended if you plan to use this Pi with a Mobilinkd TNC. There are known issues with the onboard WiFi and Bluetooth on the Raspberry Pi 3B+.
If you’re using an external USB WiFi adapter, read the notes in step 9 carefully.
As I mentioned earlier, I intend to use my Raspberry Pi in the field without access to the Internet. However, I still need the ability to connect to it remotely from my phone, tablet or laptop. To achieve this goal we will configure our Pi to act as a wireless access point.
In this section, we will configure our access point to use the 192.168.5.0/24 network and we'll name our WiFi access point after the radio we plan to use with it. Trust me, when you have three or four Pi's, this will help.
Ensure your Pi is still connected to your ethernet network as we need access to the internet for this section.
Remotely connect to the Pi from another computer using an SSH client. On Windows, you can download Putty. Under Mac or Linux, simply open a terminal and execute:
$ ssh pi@ip-address-of-your-piRemember: we made a note of the Pi's IP address in the last section.
- Once logged in, update the OS.
$ sudo apt update
$ sudo apt upgrade- Install access point and DNS software.
$ sudo apt install hostapd dnsmasq -y- Enable access point software and enable on boot.
$ sudo systemctl unmask hostapd
$ sudo systemctl enable hostapd- Allow firewall rules to be preserved on reboot.
$ sudo DEBIAN_FRONTEND=noninteractive apt install -y netfilter-persistent iptables-persistent- Configure DHCP.
$ sudo nano /etc/dhcpcd.confAdd the following to the end:
interface wlan0
    static ip_address=192.168.5.1/24
nohook wpa_supplicant- Enable routing and IP masquerading.
$ sudo nano /etc/sysctl.d/routed-ap.confAdd the following:
# Enable IPv4 routing
net.ipv4.ip_forward=1- Enable IP masquerading and save the firewall rules. Note: if the iptables command fails with "iptables/1.8.2 Failed to initialize nft: Protocol not supported", try to unplug the WiFi dongle, then re-run the command, then re-connect the WiFi dongle.
$ sudo iptables -t nat -A POSTROUTING -o eth0 -j MASQUERADE
$ sudo netfilter-persistent save- Configure DNS and DHCP for the wireless network.
$ sudo mv /etc/dnsmasq.conf /etc/dnsmasq.conf.orig
$ sudo nano /etc/dnsmasq.conf
Add the following to the end:
interface=wlan0 # Listening interface
dhcp-range=192.168.5.2,192.168.5.20,255.255.255.0,24h
        # Pool of IP addresses served via DHCP
domain=wlan     # Local wireless DNS domain
address=/gw.wlan/192.168.5.1
# Alias for this router- Enable wireless operation.
$ sudo rfkill unblock wlan- Configure the access point. Change the SSID and password accordingly. I like to set the SSID to the name of my radio (which also happens to be the same as the hostname that we set earlier).
$ sudo nano /etc/hostapd/hostapd.confAdd the following:
country_code=US
interface=wlan0
ssid=ft60r
hw_mode=g
channel=7
macaddr_acl=0
auth_algs=1
ignore_broadcast_ssid=0
wpa=2
wpa_passphrase=hamradio
wpa_key_mgmt=WPA-PSK
wpa_pairwise=TKIP
rsn_pairwise=CCMP- Reboot.
$ sudo rebootWhen the system reboots, it should start up as a wireless access point. Connect to its WiFi hotspot from another computer and test the connection.
Now, your Pi will always be available at a fixed IP address (192.168.5.1). Therefore, when you associate a device to this WiFi hotspot, you will be assigned an IP address on the 192.168.5.0/24 network. You can remotely connect via SSH (ssh pi@192.168.5.1) or via VNC.
This approach was based on this article.
Conclusion
In this article, we installed Raspberry Pi OS and configured it to function as a wireless router. This gives us the flexibility to have temporary access to the Internet when it is connected to the wired ethernet port, but more importantly, it allows any WiFi enabled device to connect to its hotspot in the field.
Again, the goal here is to have a reliable OS that acts very mush as an appliance and remains fairly static. It will only be connected to the Internet during the initial install and when the occasional data set needs to be updated.
This installation approach shall be referenced in other articles on this site as it will be the foundation for installing various ham radio field stations. Stay tuned for these future articles.